35mm Negative Orange Mask

Get answers to your questions about color grading, editing and finishing with DaVinci Resolve.
  • Author
  • Message
Offline

Gavin_c_clark

  • Posts: 299
  • Joined: Thu Apr 16, 2015 3:51 pm

35mm Negative Orange Mask

PostSun Nov 01, 2015 4:52 pm

Hi all,

I've been pulling out some old film kit and have managed to get the 35mm Scanner my dad built for me up and running again (it's been sat in a cupboard for many years) and i'd like to transfer some old reels to UHD now computers are fast enough and resolve can handle it comfortably- but I cannot remember how I got rid of the orange mask way back then- if I recall it was a really long winded photoshop action-
Can anyone recommend a way to do it in resolve?
I've attached a JPEG of a scan (loads of alignment to get right, like I said it's been in a cupboard under my hiking boots; its cropped too)
Many thanks in advance

Gavin
Attachments
DSC_0003.jpg
DSC_0003.jpg (831.27 KiB) Viewed 3491 times
scanner.jpg
scanner.jpg (101.28 KiB) Viewed 3491 times
Offline

davidanderson

  • Posts: 221
  • Joined: Fri Jun 26, 2015 9:26 pm

Re: 35mm Negative Orange Mask

PostMon Nov 02, 2015 8:46 pm

Offline

Gavin_c_clark

  • Posts: 299
  • Joined: Thu Apr 16, 2015 3:51 pm

Re: 35mm Negative Orange Mask

PostMon Nov 02, 2015 9:03 pm

Thankyou for that David,

That looks like a great resource of technical information!

I've been playing in resolve with DNG's from the scanner (the frame is from a camera scratch test reel and is very soft focus due to an incorrect ffd on the camera mount) but theres still a tint across the frame that I can't completely get rid of quickly- hopefully that document will hold the key!

Regards
Gavin
Attachments
Timeline 100086400.jpg
Timeline 100086400.jpg (324.73 KiB) Viewed 3480 times
Offline

davidanderson

  • Posts: 221
  • Joined: Fri Jun 26, 2015 9:26 pm

Re: 35mm Negative Orange Mask

PostMon Nov 02, 2015 11:00 pm

No problem, I really like the scanner setup you have there, any chance of some more hi-res pictures of it or some details?

BTW. Page 9 & 10 of the document show how easy it is to remove the orange mask portion of the problem, the conversion from negative to positive is another issue, and there is more info that you would ever want to know in that document :)
Offline
User avatar

Marc Wielage

  • Posts: 11053
  • Joined: Fri Oct 18, 2013 2:46 am
  • Location: Hollywood, USA

Re: 35mm Negative Orange Mask

PostTue Nov 03, 2015 12:20 am

I think the best way to do compensate for the orange mask is to do so in the scan itself. The Arriscanner, the Northlight scanners, the DFT (aka Spirit) scanners, and many others automatically add enough blue to compensate for the orange mask in Camera Negative, Internegative, and Interpositive. I believe the Blackmagic Cintel scanner has a setup mode providing for this as well, but I don't know enough about it to say yet.
marc wielage, csi • VP/color & workflow • chroma | hollywood
Offline

davidanderson

  • Posts: 221
  • Joined: Fri Jun 26, 2015 9:26 pm

Re: 35mm Negative Orange Mask

PostTue Nov 03, 2015 12:55 am

Absolutely, but that doesn't look like an option for this scanner.
Offline
User avatar

Marc Wielage

  • Posts: 11053
  • Joined: Fri Oct 18, 2013 2:46 am
  • Location: Hollywood, USA

Re: 35mm Negative Orange Mask

PostTue Nov 03, 2015 10:45 am

Then I would scan a piece of test film and reverse engineer how to get a normal picture out of it. Getting a scanner adjusted correctly for proper RGB balance and optimized DMIN and DMAX is really critical.
marc wielage, csi • VP/color & workflow • chroma | hollywood
Offline

Gavin_c_clark

  • Posts: 299
  • Joined: Thu Apr 16, 2015 3:51 pm

Re: 35mm Negative Orange Mask

PostTue Nov 03, 2015 5:08 pm

Hi David,

Here's a little more detail about the machine-

My dad built it over the course of a years worth of trial and error- I provided 'parts and theory'! Alas dad is no longer with us so some of the more complicated parts of its construction I can only recollect from a high level.

Its based on an Oxberry computer camera from a film recorder- the movement is rock solid and mechanically its built like a tank- tis almost impossible to move the film whilst its registered. The movement simply has the back removed and a diffused light source placed behind it- we tried LED's but found that over time they pulsed from frame to frame. Also, to get sufficient depth to focus a sharp image at such a small target we needed to increase the power- hence the lamp housing and fan arrangement.

The movement is continually rotating and can capture at up to 21 frames per minute- not the fastest but when it was built it was hampered by the speed of memory storage.

With the frame arrested, a cam completes a circuit inside that send a wireless signal to the Nikon DSLR to capture the frame in raw, via a nikkor 75mm enlarger lens on a bellows system straight to SD card for converting on the computer to video/dpx.

It was never going to be as good as an arriscan but we were pleasantly surprised when it beat a spirit transfer- and 5 years later it still works and can hold its own!

PS I need to clean it out- hence the dust in the photos!
Attachments
IMG_1346.JPG
IMG_1346.JPG (100.65 KiB) Viewed 3417 times
IMG_1345.JPG
IMG_1345.JPG (76.5 KiB) Viewed 3417 times
IMG_1343.JPG
IMG_1343.JPG (88.08 KiB) Viewed 3417 times
Offline

Gavin_c_clark

  • Posts: 299
  • Joined: Thu Apr 16, 2015 3:51 pm

Re: 35mm Negative Orange Mask

PostTue Nov 03, 2015 5:10 pm

Marc Wielage wrote:I think the best way to do compensate for the orange mask is to do so in the scan itself. The Arriscanner, the Northlight scanners, the DFT (aka Spirit) scanners, and many others automatically add enough blue to compensate for the orange mask in Camera Negative, Internegative, and Interpositive. I believe the Blackmagic Cintel scanner has a setup mode providing for this as well, but I don't know enough about it to say yet.


Hi Marc,

Thanks for the advice- I've had a play with some CTB gels and RAW colour temp settings and am getting a lot closer- I shall seek out some telecine test film and try to refine!

Thanks
Gavin
Offline
User avatar

Marc Wielage

  • Posts: 11053
  • Joined: Fri Oct 18, 2013 2:46 am
  • Location: Hollywood, USA

Re: 35mm Negative Orange Mask

PostWed Nov 04, 2015 10:15 am

I think it will be problematic to try to build something like this from scratch. I would be very wary of the precision of the gate mechanism, getting a flat field from the light source, and also the potential for damaging the film with the mechanism. I've used about a dozen different scanners over the last 30 years, and even the good ones can destroy film very quickly if you look at them sideways. Getting good images out of them is not for the faint of heart, particularly in getting predictable, linear color from film.
marc wielage, csi • VP/color & workflow • chroma | hollywood
Offline

davidanderson

  • Posts: 221
  • Joined: Fri Jun 26, 2015 9:26 pm

Re: 35mm Negative Orange Mask

PostThu Nov 05, 2015 2:59 am

You can use LEDs successfully, but the reason th ones you tried were pulsing, was that there are multiple ways to drive LEDs, and many pre-built systems use a system that turns the LEDs off and on extremely quickly, to save power, and this type will produce flicker.

If you design the LED stage correctly, and use an array of Red, Green and Blue LEDs you can make a very precise light source, that is flicker free, and you can adjust the mix to cater for faded film etc.
You can mount an integrating sphere to get a complete and perfectly diffuse light source from them.

Thanks for the pictures, using the Oxberry should give you a very stable output.
Offline
User avatar

Perry

  • Posts: 198
  • Joined: Mon Sep 10, 2012 1:54 pm
  • Location: Boston, MA

Re: 35mm Negative Orange Mask

PostSat Nov 07, 2015 1:27 pm

davidanderson wrote:Absolutely, but that doesn't look like an option for this scanner.


Depends. If the light source is accessible, you could just insert a colored filter to compensate, between the light and the film. Or, if the camera uses a standard lens, a screw-on filter would do it as well.

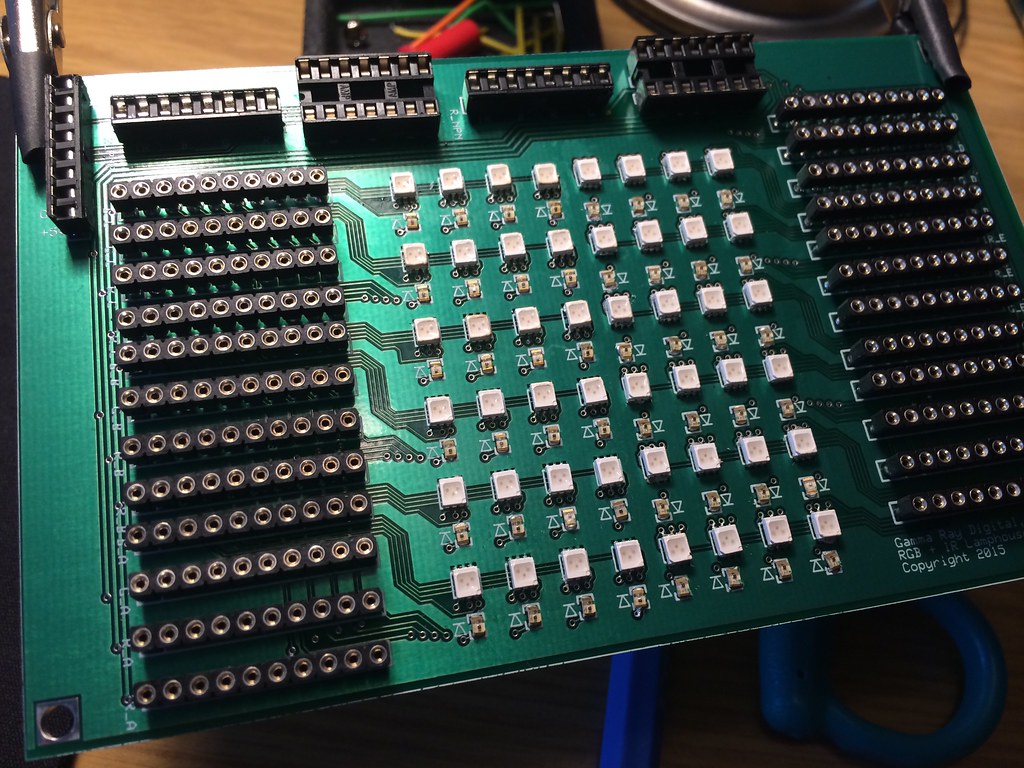
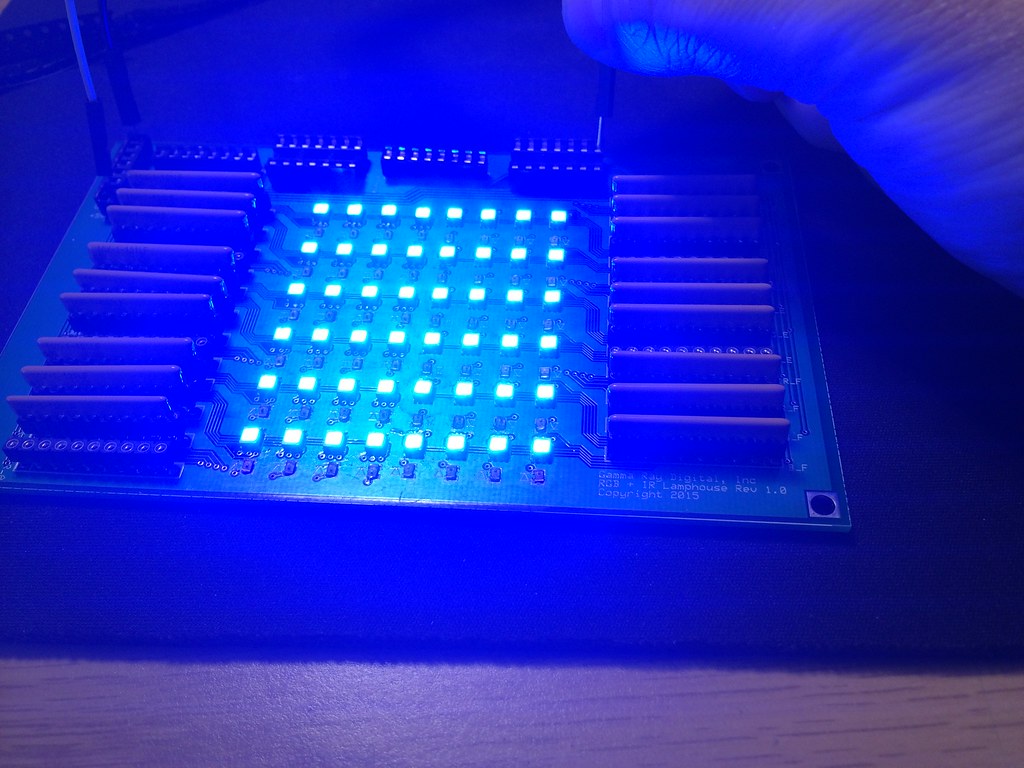
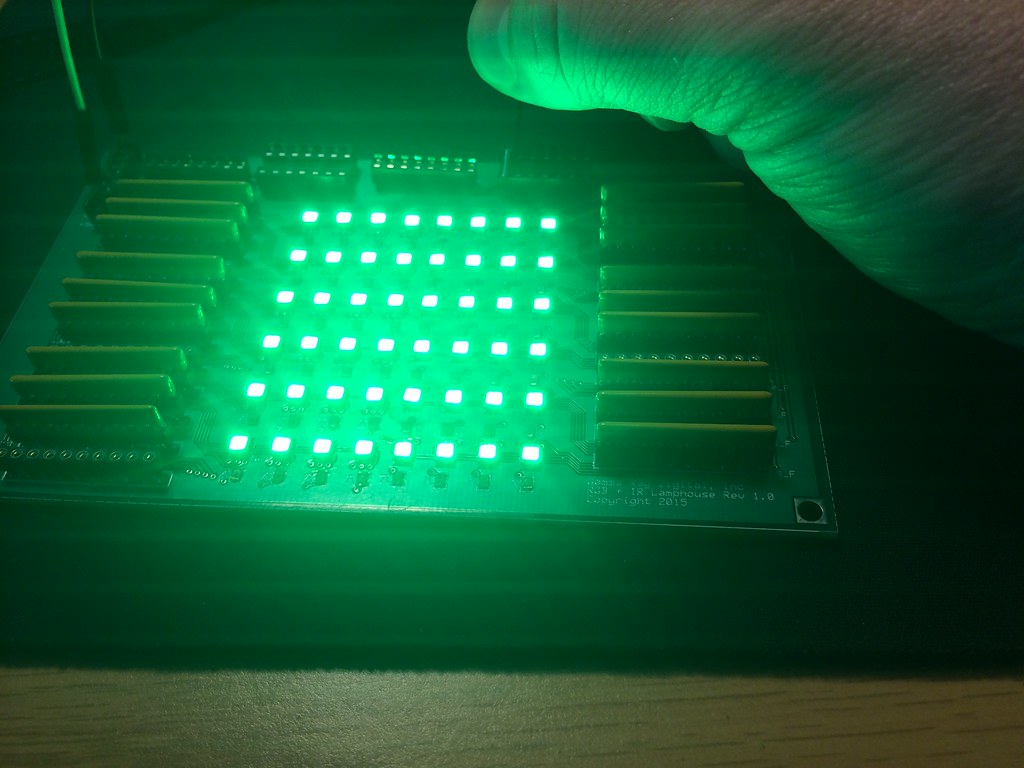
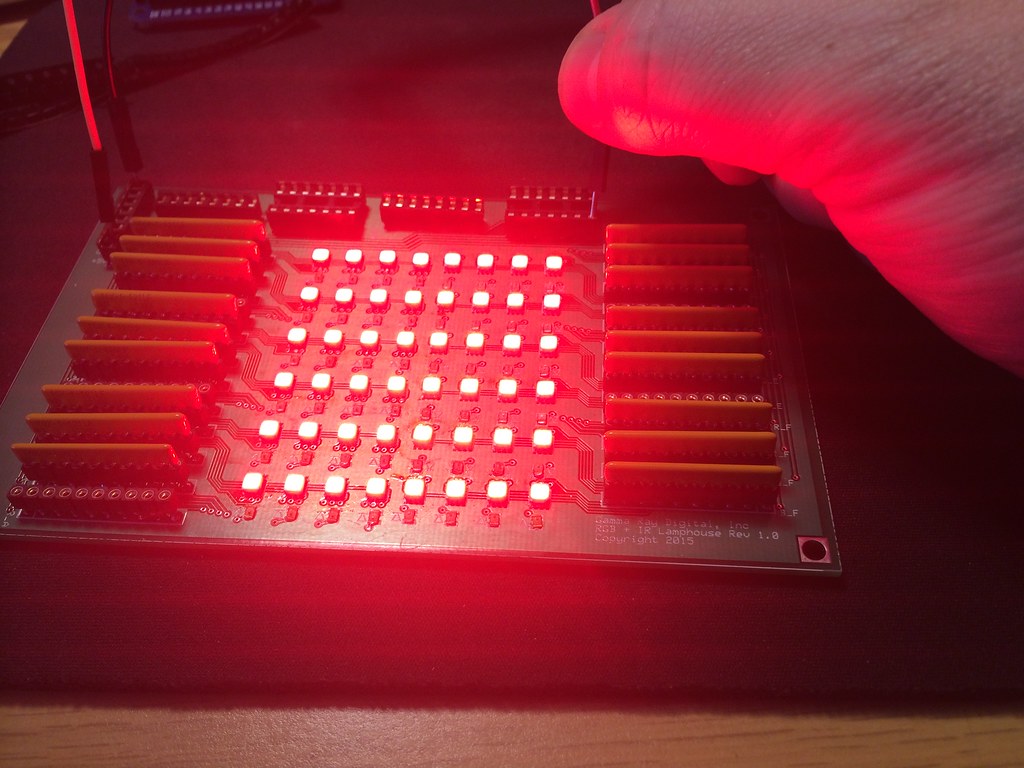
As for an LED, you can build a pretty nice RGB setup with some time and an Arduino. We're rebuilding an old Imagica scanner with totally new sensor and light source, and the LED array I built for it uses RGB for color and IR for a dust map:

Image
Image
Image
Image

video: https://flic.kr/p/rw5wCQ

This is a prototype, and goes inside of a 3D printed lamphouse that has a reflective interior surface. The light then goes through a holographic diffuser before hitting the film. The idea with this design is that from the Arduino, we can easily tweak the color, because each color of the RGB LEDs (the white ones on the circuit board) can be turned on and off independently, and its intensity can be adjusted.

So you could compensate for the orange cast in the light source this way.
Perry Paolantonio
Gamma Ray Digital - 288 Walnut St Suite 105, Newton MA 02460
14k Film Scanning -- Color Grading -- Film Restoration
www.gammaraydigital.com

Return to DaVinci Resolve

Who is online

Users browsing this forum: a.r.butler, Bing [Bot], Daniel Batinic, Google [Bot] and 226 guests