- Posts: 30
- Joined: Sat Dec 17, 2022 12:08 am
- Real Name: Xander Wanlass
![]() Sun Mar 05, 2023 1:52 am
Sun Mar 05, 2023 1:52 am
I've seen a lot of posts complaining about this issue and I myself have been confused about this in the past, so I thought I'd make a post to explain it all in one place and provide a few resources since I think it’d be helpful.
Have you masked or keyed something, only to discover after merging it that there’s an ugly dark ring around it? Well (as far as I know) there are three major reasons this could be happening:
Discussing desaturation methods:
I hope this post is helpful to anyone searching for answers in the future. Fusion's greatest strength and greatest weakness is that it forces you to think about every step of image processing that goes into a final composite. That's why I love it as a learning playground.
If any part of this is incorrect or misleading, please feel free to reply and I will edit the post accordingly.
Have you masked or keyed something, only to discover after merging it that there’s an ugly dark ring around it? Well (as far as I know) there are three major reasons this could be happening:
- Alpha premultiplication
- Working with nonlinear color
- Spill suppression
- Alpha premultiplication. This is a subject I want to take a deeper dive into in a video. Too often, the alpha channel gets simplified into the “transparency channel,” but there’s a reason that it’s called alpha; it’s a mathematical coefficient. Credit to Bryan Ray for this, but when you merge something in Fusion, for each color channel it takes the background, multiplies it by one minus the foreground’s alpha, and then adds the foreground.
Cbg * (1-αfg) + Cfg
But wait, all you did was add the foreground colors! In nonwhite areas, the amount you reduced in the background will not balance out the foreground values you're adding.- Merging an unpremultiplied image results in above-one values
- Bad_Comp.jpg (44.28 KiB) Viewed 1649 times
This is because Fusion's merge nodes anticipate pre-multiplied inputs, meaning that the RGB color values have been multiplied by the alpha. This solves the issue of brightening nonwhite areas. and this is what masks do by default.
The problem comes if you perform any color modifications on the image. Since the RGB values have been darkened at the edges of masked images, your color modifications will not behave correctly. This is what that "pre-divide/post-multiply" fixes. The image is first divided by its alpha, which to a certain extent recovers the original colors (depending on bit depth and how close to 0 the alpha is at each point), then it's modified by the effect your node is computing, then it's multiplied by alpha again. The problem comes if you accidentally multiply an image that is already premultiplied. You're multiplying the color values by alpha again, which is darkening semitransparent edges.- Merging an image that has been multiplied by alpha twice.
- Double_Multiplied.jpg (52.46 KiB) Viewed 1649 times
To prevent this, whenever you're making color changes to a premultiplied image, always pre-divide, then post-multiply. This includes gamut nodes, blurs, curves, etc. If the nodes you're using don't have this option, Fusion has the "alpha divide" and "alpha multiply" nodes at your disposal. Just use alpha divide beforehand, then make your color changes, and then alpha multiply afterward. - Working with nonlinear color. This is a really complex topic that I still don't fully comprehend, but to understand the fundamentals I personally recommend this video.

The important thing to understand is that regardless of what your working color space is in Fusion, your monitor is going to add an inverse gamma curve to the image. This means that for any values between the minimum and maximum, a display is going to darken them according to its gamma curve. For instance, take a look at this [Red] dot over this green background.- On the left, a feathered red dot is merged straight away. On the right, I removed the gamma from the red dot and green bg, then added it back at the end. Using sRGB.
(Note: in this case it's technically not necessary to de-gamma the backgrounds since they're 100% red and green respectively. I just said that to show the process.) - LinearizedGreenRed.png (694.36 KiB) Viewed 997 times
Notice the dark ring around the [Red] dot? As Fusion interpolates between [Red] and green, it does so linearly. But again, your monitor isn't designed to accept a linear input, so it's darkening intermediate values unnecessarily. How do you fix this? Well, you need to work in linear gamma and then use a gamut node (or color space transform in Resolve) to add back the gamma curve that you removed. Here's a minutephysics video on this subject.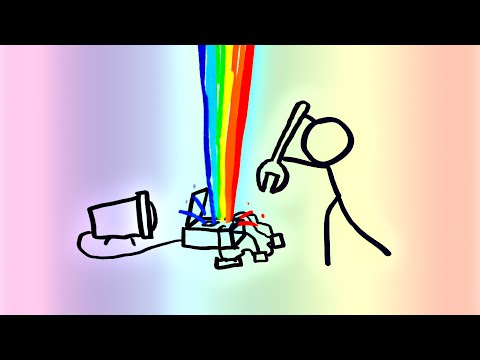
This is an area that is severely lacking in Fusion tutorials and it's something I had to figure out myself. If an image you generated in Fusion is intended to be seen in the final result, you need to treat that image just like you would treat your footage.- Code: Select all
Edit: This is incorrect for reasons I'm going to explain later, but basically this works for solid colors, not for gradients or complex backgrounds.
(Fun fact! I'm pretty sure Resolve's default transitions have a dark trail when motion blur is enabled as a result of them not taking gamma into account!)
If I'm not mistaken, the technically correct way to do this would be to just add the gamma curve after you've done all of your work. The reason I say this is technically correct is that these nodes are inherently linear in nature, so you should really only be adding a curve. However, if you do this the preview color in the inspector won't match up with the output. For that reason, I believe it's more useful to remove the curve from your generator nodes before compositing, then add the curve afterwards. Just like regular footage. If any part of that statement is wrong, I would really love to be corrected.- Code: Select all
Edit: This technique works fine for solid backgrounds and it's a technique I will continue to employ for this purpose, but unfortunately there's no good way to do this in a gradient since your gamut nodes will affect any color between minimum and maximum, not just the interpolated colors in a gradient node.
TL;DR: With gradients you can only really add the gamma to fix the color blending.
Also side note: I am severely struggling to understand color management and have reached out to a few different colorists and even BMD support to try and get some answers to my biggest questions to no avail. If anyone knows a good person to contact and ask, please let me know.- Code: Select all
Edit: I found this reply incredibly helpful.
Hendrik Proosa wrote:Generators by definition produce data in working space, because they produce numbers. There is no pre-determined interpretation for those numbers, so they are effectively expressing light values in working space. Meaning there is no curve to remove from them, unless it is desirable to somehow bend the data ”for reasons”. For example a ramp generator that produces 0.0-1.0 linear ramp (where values increment linearly, middle of ramp is 0.5), this ramp expresses linear-light ramp in linearized working space and logarithmic (nonlinear in linear-light domain) ramp in lets say ACEScc working space, because the intepretation of generated values depends on working space. Adding a colorspace transform after ramp applies custom explicit interpretation from user: ”take this ramp as if it were X and convert it to Y”. And if Y doesn’t align with working space, it adds another layer of ”and take this Y as if it were actually working space values”. Sounds a bit confusing maybe but concept is simple: data does not have colorspace by itself, colorspace is part of metadata for interpreting the data that can be juggled as one wishes. - Spill suppression. If you've keyed out your footage, there's a good chance you've applied some form of spill suppression. The problem with this is that it could be removing the green/blue without adding anything back to replace it which will darken your image overall, especially at the edges.
Unfortunately I can't really find a good free resource for this, all I can do is recommend VFXstudy's "Compositing with DaVinci Resolve & Fusion" course. Specifically, lesson 6.9 "Despill and Spill Color Replacement." Use a Channel Booleans node and subtract the RGB values of the de-spilled image from the untouched image. Then use this output as a matte to add back some "spill" of your choice.
- Code: Select all
Edit: the following are a couple of responses from Bryan Ray and Hendrik Proosa
Bryan Ray wrote: This is most likely to be a problem for green spill, as something like 70% of the image's luminance comes from the green channel. If it's critical to maintain the image's luminance (it may not be if you're performing color corrections on the foreground to integrate with a new background), here's the procedure I learned:
Perform a Difference Merge of the original image and the despilled version. Desaturate the result completely. Add that back to the despilled image. That should restore the luminance to its original levels. This should be more accurate than eyeballing it with a Color Corrector.
Discussing desaturation methods:
Hendrik Proosa wrote:Exact coefficients are irrelevant, idea is to just add back some of the ambient environment light and reflected light intensity that gets removed by despill. You can take just the green (or blue) too and shuffle it to rgb, scale it to make stronger etc.
I hope this post is helpful to anyone searching for answers in the future. Fusion's greatest strength and greatest weakness is that it forces you to think about every step of image processing that goes into a final composite. That's why I love it as a learning playground.
If any part of this is incorrect or misleading, please feel free to reply and I will edit the post accordingly.
Last edited by Snadegg on Tue Mar 14, 2023 3:48 am, edited 4 times in total.
Windows 11, RTX 3070, Ryzen 5900x, 96 GB @ 3200MHz
