AndrewTheGreat wrote:it doesn't work, or I don't get it right. Here's my node tree:
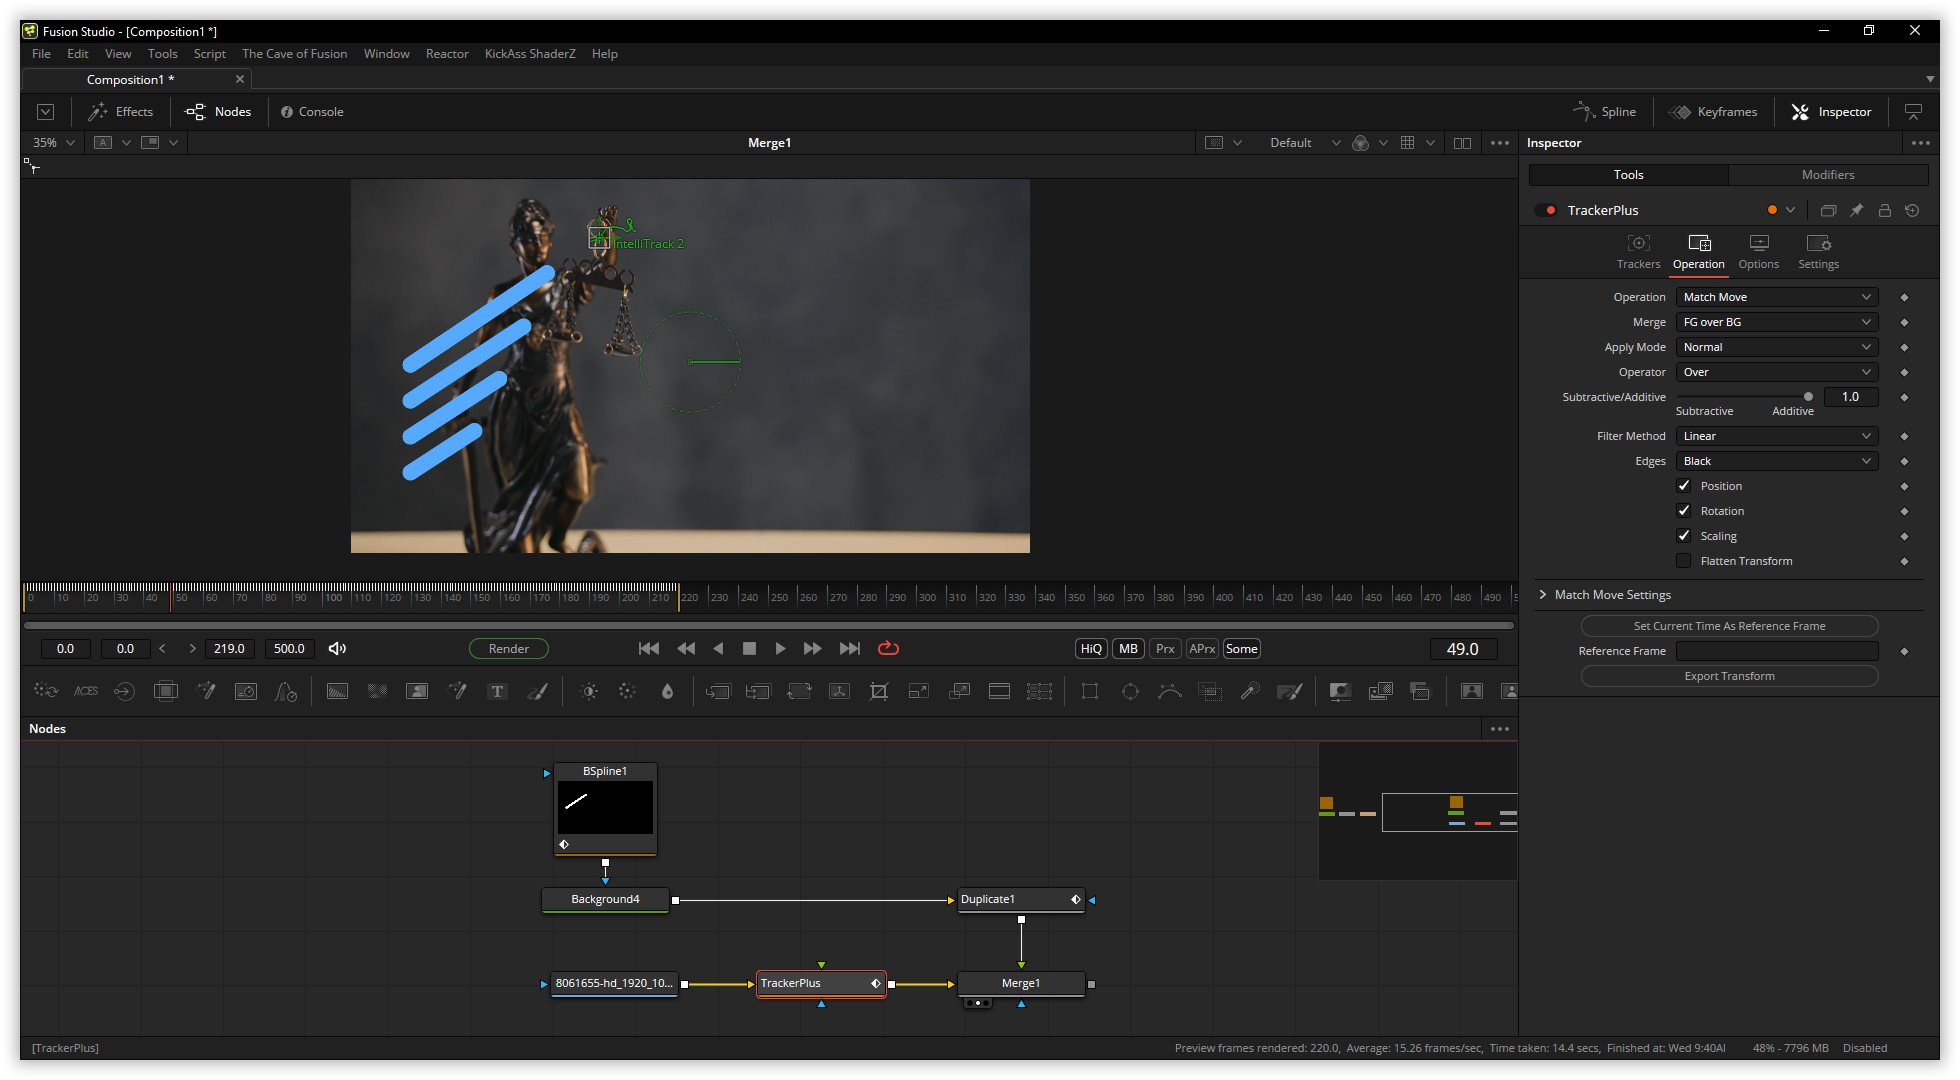
Hmm. You have publish point to a tracker. IntelliTracker in this case. At least from what I can see. So probably you did it right, but you didn't mention the publish point to a tracker situation, which means that you would likely have to take a differnt approach than simple copy and paste. Tracker is the X factor here and it has its own tracking data. I would have to see the entire set up to be sure, but likely the best thing to do in situation where you have a point being controlled by a tracker is to track the point you want, no lines at the time, and than use the tracking data on what you want to follow the tracking point.
Depending on what kind of animation or VFX you are doing, and what level of control you need, there are many ways to go about it.
Generally what I would do is use is use tracker and than perform match move later. You could always connect the point to a track as well, via connect to... menu, but I prefer most of the time to use tracker node or its derivative transform with tracking data to do match move. As most things in fusion, its few steps to set up but than you are clear to work with more flexibility later on.
Basically, you use tracker to track. Than when you have performed the tracking you match move either the whole animation if that is what you need or in the case of specific polygon point, you can select the point, publish it and connect it to tracker.
For example , lets say camera is moving away from the this stature on the desk and I wanted my four lines to gradually grow and appear in time and position offset, but I want second point on the line to match the point I tracked.
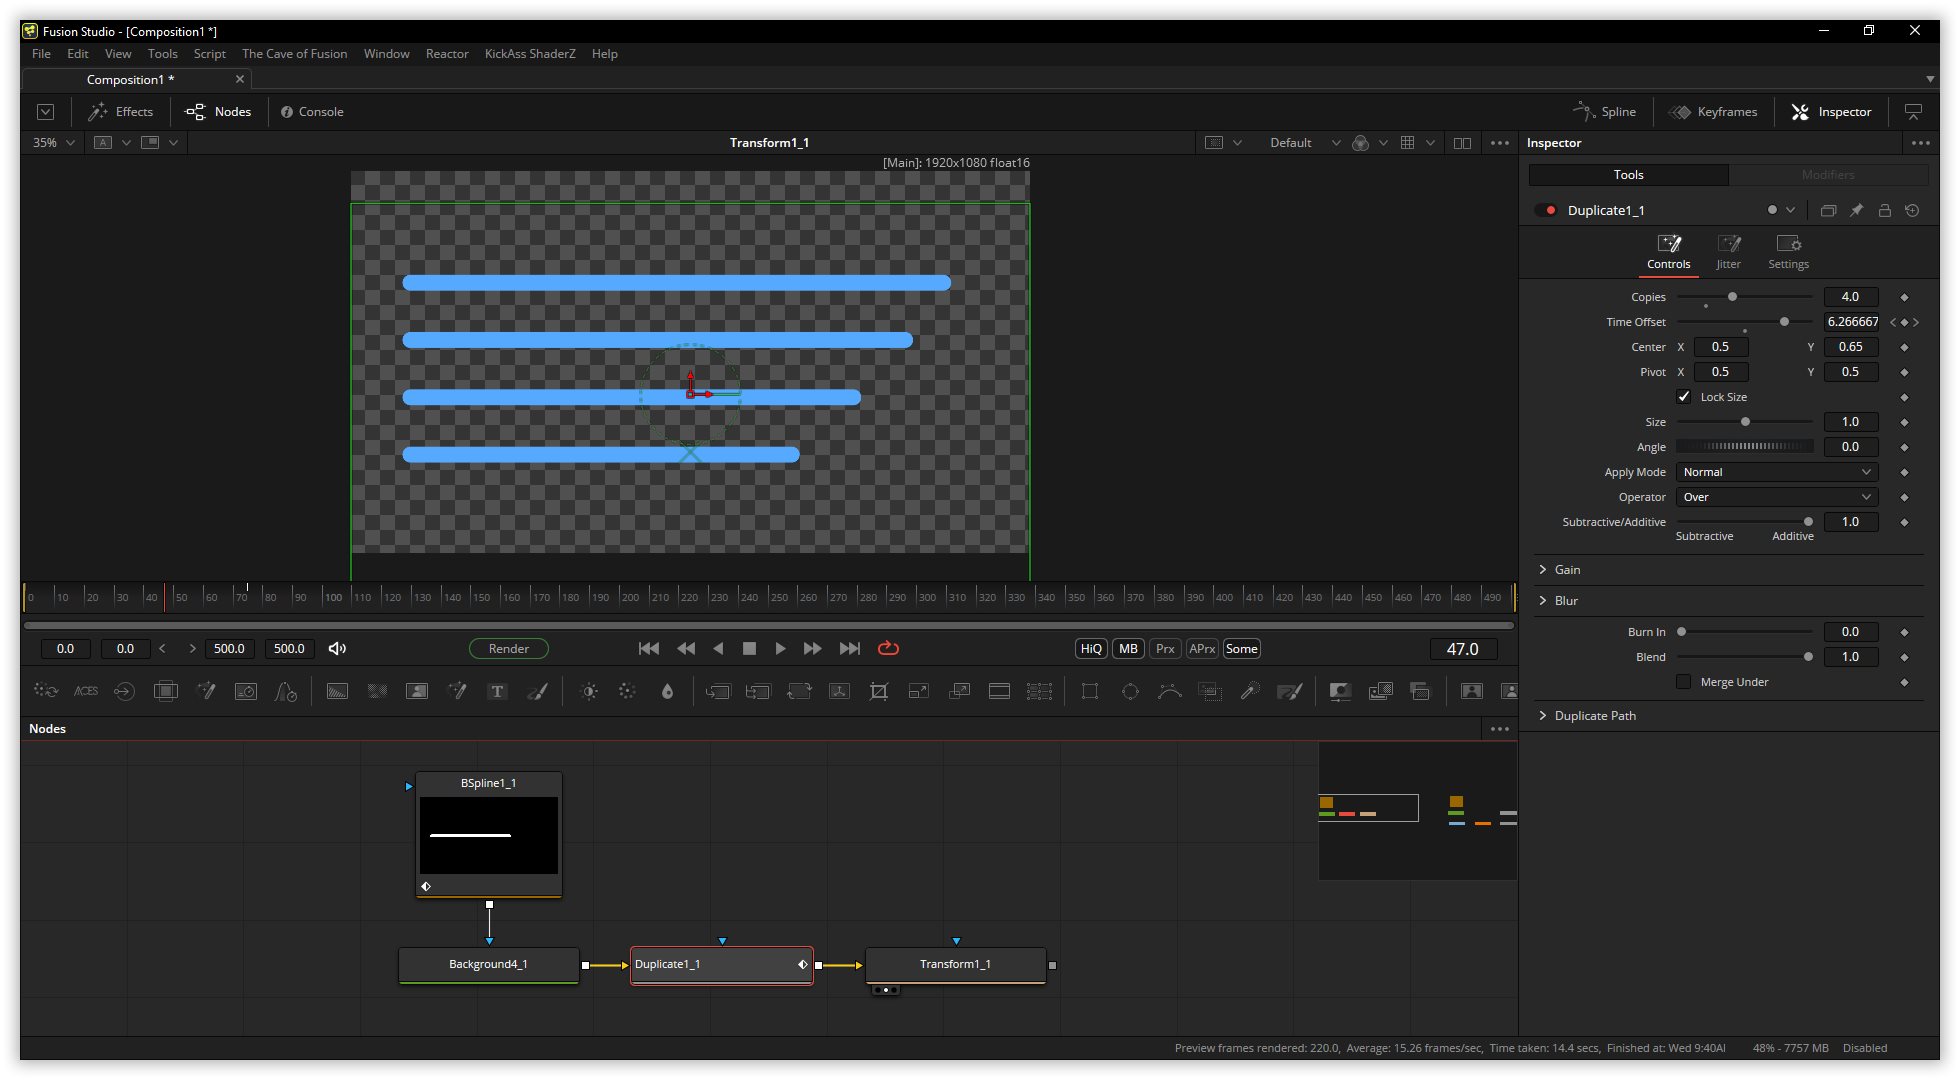
I can make one line and animate its lenght, color and all that. Than I would use duplicate node to offset it in position and timing, giving me four lines with are duplicates of the first with time offset so the lenght parameter is lagging behind in each line. And if I connect second point of the first line to tracker position than all the four lines also match the movement. At this point I could change lines or position or whatever, and it would all work.
- sshot-1158.jpg (194.61 KiB) Viewed 434 times
Otherwise if I just needed to extend a line, I would animate the lenght, use duplicate node to offset position and or time.
- Code: Select all
{
   Tools = ordered() {
      BSpline1_1 = BSplineMask {
         DrawMode = "ClickAppend",
         DrawMode2 = "InsertAndModify",
         CtrlWZoom = false,
         Inputs = {
            Filter = Input { Value = FuID { "Fast Gaussian" }, },
            BorderWidth = Input { Value = 0.0234, },
            Solid = Input { Value = 0, },
            WriteLength = Input {
               SourceOp = "BSpline1_1Length",
               Source = "Value",
            },
            MaskWidth = Input { Value = 1920, },
            MaskHeight = Input { Value = 1080, },
            PixelAspect = Input { Value = { 1, 1 }, },
            ClippingMode = Input { Value = FuID { "None" }, },
            Polyline = Input {
               SourceOp = "BSpline1_1Polyline",
               Source = "Value",
            },
            Polyline2 = Input {
               Value = BSplinePolyline {
                  Order = 4,
                  Type = "Tensioned",
                  Knots = { }
               },
               Disabled = true,
            }
         },
         ViewInfo = OperatorInfo { Pos = { -434.217, -40.8807 } },
      },
      BSpline1_1Length = BezierSpline {
         SplineColor = { Red = 141, Green = 167, Blue = 243 },
         CtrlWZoom = false,
         NameSet = true,
         KeyFrames = {
            [0] = { 0, RH = { 25, 0 } },
            [75] = { 1, LH = { 50, 1 } }
         }
      },
      BSpline1_1Polyline = BezierSpline {
         SplineColor = { Red = 173, Green = 255, Blue = 47 },
         CtrlWZoom = false,
         NameSet = true,
         KeyFrames = {
            [0] = { 0, Flags = { LockedY = true }, Value = BSplinePolyline {
                  Points = {
                     { X = -0.4125, Y = -0.00740740740740742 },
                     { X = 0.406252650547024, Y = -0.00740740740740742 }
                  },
                  Order = 4,
                  Type = "Tensioned",
                  Knots = { }
               } }
         }
      },
      Duplicate1_1 = Fuse.Duplicate {
         Inputs = {
            Copies = Input { Value = 4, },
            TimeOffset = Input {
               SourceOp = "Duplicate1_1TimeOffset",
               Source = "Value",
            },
            Center = Input { Value = { 0.5, 0.65 }, },
            GainNest = Input { Value = 1, },
            Polyline = Input {
               Value = Polyline {
               },
            },
            Background = Input {
               SourceOp = "Background4_1",
               Source = "Output",
            }
         },
         ViewInfo = OperatorInfo { Pos = { -324.217, 36.089 } },
      },
      Duplicate1_1TimeOffset = BezierSpline {
         SplineColor = { Red = 243, Green = 56, Blue = 70 },
         CtrlWZoom = false,
         NameSet = true,
         KeyFrames = {
            [0] = { 0, RH = { 25, 3.33333333333333 }, Flags = { Linear = true } },
            [75] = { 10, LH = { 50, 6.66666666666667 }, Flags = { Linear = true } }
         }
      },
      Background4_1 = Background {
         Inputs = {
            EffectMask = Input {
               SourceOp = "BSpline1_1",
               Source = "Mask",
            },
            GlobalOut = Input { Value = 500, },
            Width = Input { Value = 1920, },
            Height = Input { Value = 1080, },
            ["Gamut.SLogVersion"] = Input { Value = FuID { "SLog2" }, },
            TopLeftRed = Input { Value = 0.333333333333333, },
            TopLeftGreen = Input { Value = 0.666666666666667, },
            TopLeftBlue = Input { Value = 1, },
            GradientType = Input { Value = FuID { "Radial" }, },
            Start = Input { Value = { 0.5, 0.5 }, },
            Gradient = Input {
               Value = Gradient {
                  Colors = {
                     [0] = { 1, 1, 1, 1 },
                     [1] = { 0, 0, 0, 1 }
                  }
               },
            }
         },
         ViewInfo = OperatorInfo { Pos = { -434.217, 36.089 } },
      },
      Transform1_1 = Transform {
         Inputs = {
            Center = Input { Value = { 0.5, 0.265 }, },
            Input = Input {
               SourceOp = "Duplicate1_1",
               Source = "Output",
            }
         },
         ViewInfo = OperatorInfo { Pos = { -214.217, 36.089 } },
      }
   }
}
- sshot-1159.jpg (208.78 KiB) Viewed 434 times
.....................
Another way you can change lenght parameter in a polygon or B-spline, regardless of shape or difference is to leverage some scripting. The other day I saw a cool method for that. Using QGIS, a free open source Map data software. Which can be used to export data about for example borders of countries in vector shapes. This can be imported as SVG to fusion and than you can animate each polyline to draw so instead of drawing them manually, they are driven by script that works on all of them. This is also something you might be able to leverage for your project.
JustCropIt made a nice post about it.
1. Install the For Slash Command for the console via Reactor [WSL thread here]
https://www.steakunderwater.com/wesuckl ... e&start=15The /for slash-command is used to quickly and easily apply changes across a number of tools.
*Version 2 includes new additions for batch renaming nodes, with setting the clip name and node attributes, and selectively rendering branches of a comp by Movalex and Andrew Hazelden. Also a version up/down versioning feature was adapted from code by PingKing*
1. Import the SVG
2. Select the SVG group and open it
3. Select all nodes in it
4. Open the console and type/paste in `/for selected animate WriteLength & set WriteLength at 0 to 0.0 & set WriteLength at 100 to 1.0`. This will add a keyframe at frame 0 and 100 for the Length setting with a value of 0.0 and 1.0 respectively. Nice but very linear
5. Open the **Spline** panel and under the hamburger menu select **Select All Tools**
6. Click the **Zoom to Fit** button (next:ish to the hamburger menu) and drag select all points/keyframes then press `f`. Easing achieved.
7. Now if Fusion treats your masks the same it does for me there might be some small glitches. I’ve learned that this is GPU related (for me) so to get rid of any glitches it would be nice to disable the GPU for all the masks… so… with all nodes still selected, in the console type/paste `/for selected PolylineMask set UseGPU to 0`
And done.
Here is video tutorial by Will Croshaw that demo it with borders.
https://www.youtube.com/@willcroshaw-cw4is
