Joe Cool wrote:But is there a way to open the Keyframe Editor for multiple clips in one step. To collapse them with one click is possible by using the modifier key alt+click. I want to go in the other direction and open more than one Keyframe Editor Bar.
I am not aware if such a feature exists in the edit page. I was not able to find it myself. Probably because most of the controls are designed to work on clip by clip basis, like the inspector panel, overlay controls in the viewer etc.
I think that is one of the reasons they added adjustment clip as a feature so multiple clips can be adjusted at once. Of course it has its limitations. It only affect the layers that are composited on top most track but bellow adjustment clip and I don't think transparency works.
Maybe there is some way with some control panel that can do more than keyboard, but I don't have access to it.
I suppose if you wanted to adjust multiple keyframes on multiple clips, you would either use copy and paste attributes if its just same adjustments. And if its differnt or needs to keyframes across multiple clips, you would use adjustment clip or put the clips into compound clip and than use keyframes on that.
You can of course also use fusion, either by using fusion clips or by using fusion composition and adding multiple clips from media pool in the composition.
.....................................................................
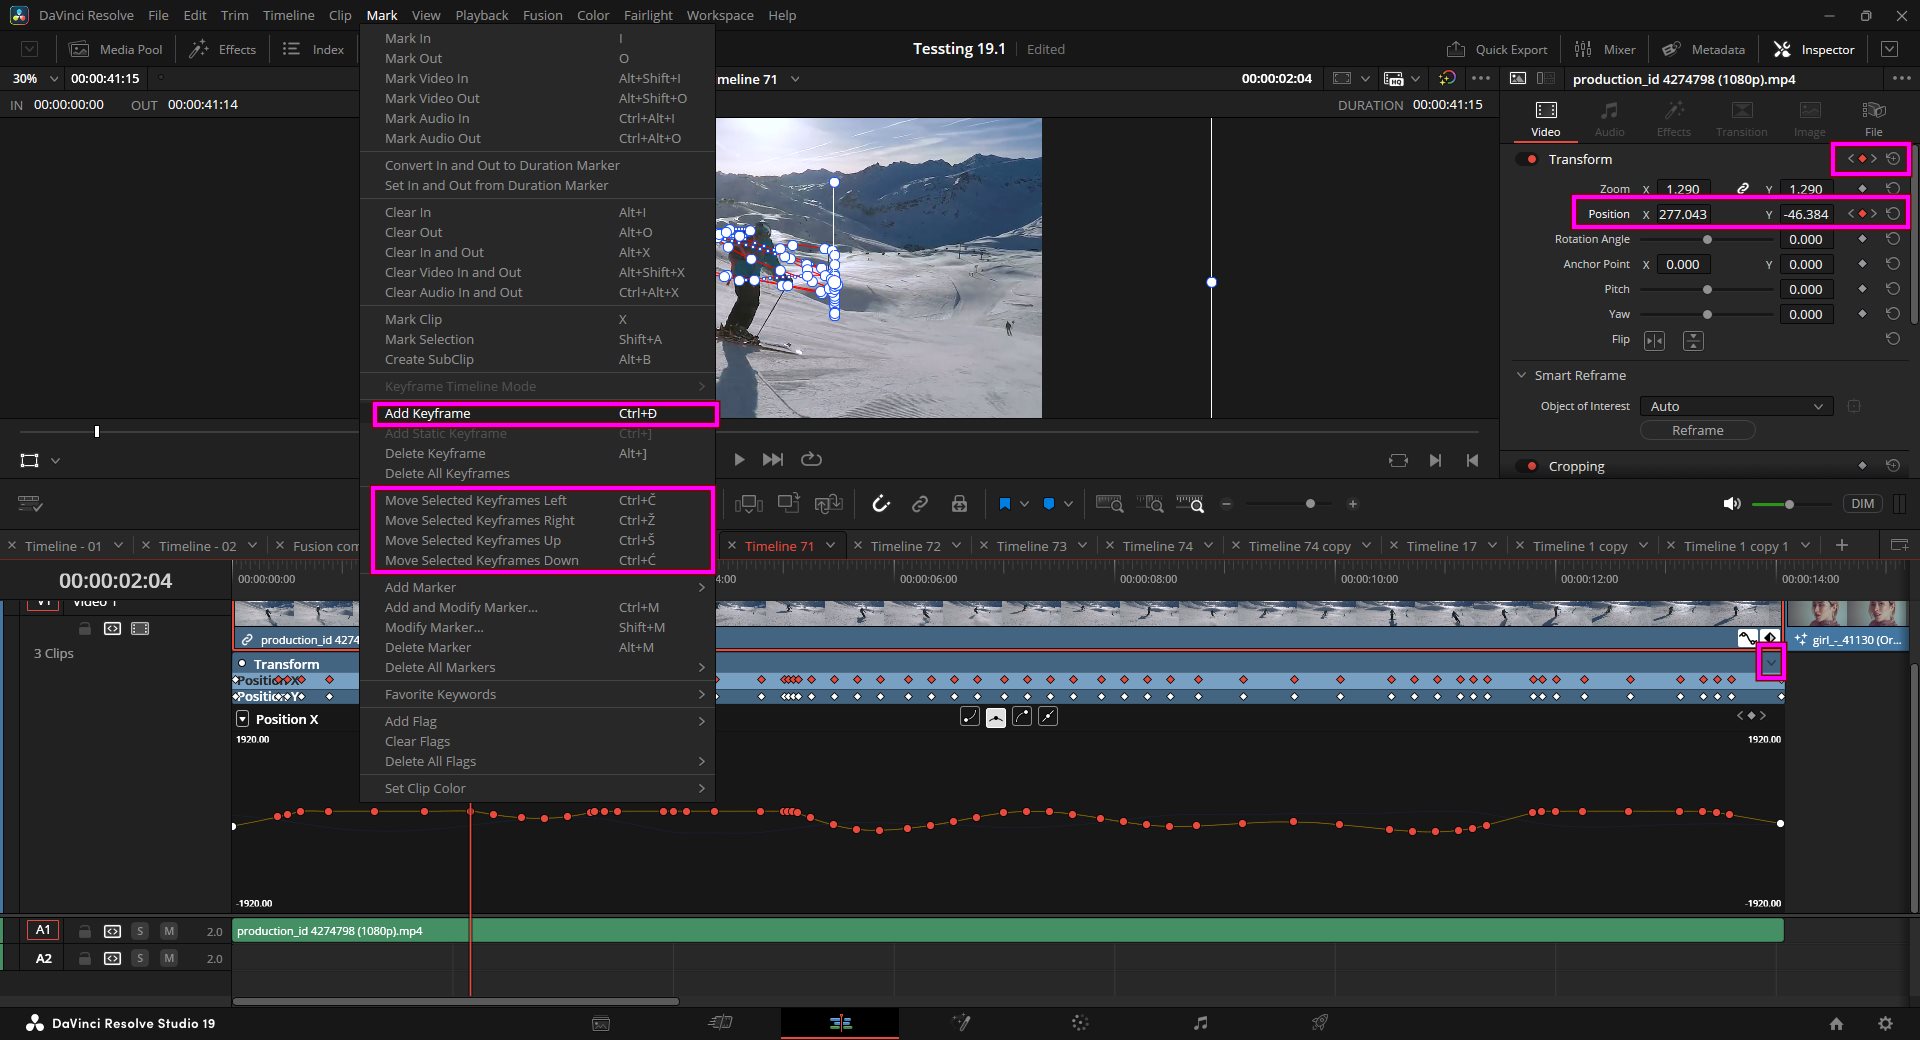
By the way in the edit page keyframe editor or keyframe splines, to duplicate one or more keyframes: Make a selection of keyframes, then hold the Option key down and drag the selected keyframes to duplicate them and move the duplicates to a new position.
Also less known feature I think is the ability to open keyframe editor, and you get essentially a usually transform set of keyframes, which represents transform section in the inspector. So this could be rotate, zoom, position X or Y. To get access to individual keyframes and parameters, there is a little downword pointing arrow at the far right of the clip, and if you open that, you get quick list view of all the parameters that were changed with all the keyframes that can be easily manipulated.
Sometimes people ask how to move the keyframes in the spline view. Especially if you want to move them only on one axis. There are several ways. You can move them incrementally and precisely in the inspector panel by moving the mouse over the number and than moving the mouse left or right. You can enter precise number, or you can go to keyframe editor and open that list view of keyframes and move them around. Also less known is that there are keyframe shorcuts that you can assign to move the keyframes up, down, left or right.
- sshot-1608.jpg (252.07 KiB) Viewed 19031 times
You can also select multiple keyframes and change easeing, but sadly we can't do it for speed points, which would be nice to have.

- sshot-1609.jpg (23.96 KiB) Viewed 19031 times
But if you work with speed point in the cut page, you can click on them with easy to apply easing options.
.....................................................................
There is also a really interesting feature for adding dynamic but context sensitive keyframes even when you play trough the timeline.
There is a shortcut to add keyframe. Basically, whatever your last slider that you used; maybe zoom or rotate when you press shortcut for keyframe, even when video is playing or when its static, it will add a keyframe for that slider. If you used zoom or transform or rotate last, it will add keyframe for the last used slider, unless there is no ability to add and than it will try to add next logical one. It will also work on speed controls. So you can add speed points that way too.
Its interesting because you don't have to worry too much about keyboard shortcuts, just one shortcut. And than after it adds keyframes, you can go in the second pass and using the methods I mentioned earlier, including keyboard shortcuts for moving keyframes, you can easily move them to position with already selected parameters. Its actually quite useful when you get used to it. Not sure if you knew about that. I just figured it out the other day, myself.
Joe Cool wrote:Let me ask another question if you time allows it. I often copy a clip from one track into another by moving the clip with the mouse and holding alt-key. This method can lead to minimal inaccuracy if perhaps there is another clip to align with a minor different length. (Perhaps a not perfect aligned audio clip.)
Is there a way to just use the keyboard? Alt-key in combination with the up/down arrows moves the clip in vertical direction. Is there a way to use this function in combination with copying the clip.
I hope I described it good enough
")
.
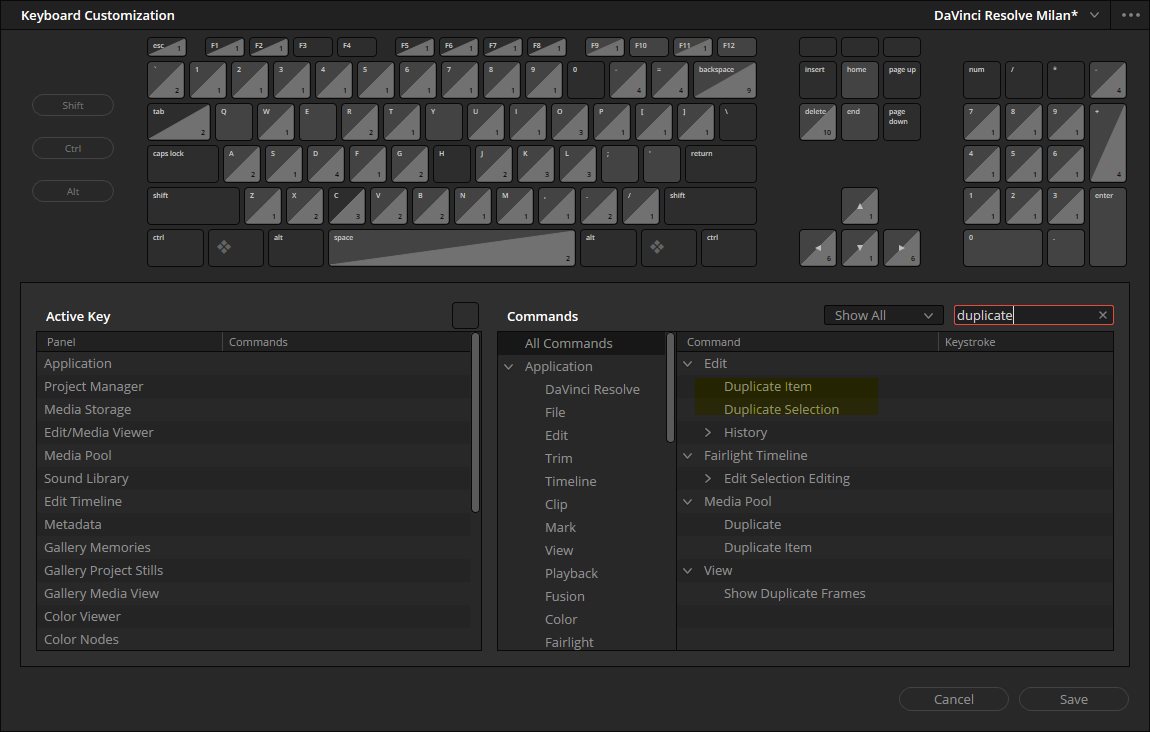
I did find a duplicate item keyboard shortcut but not sure how to use it yet. Perhaps you can figure out it when you have the time.
- sshot-1607.jpg (99.74 KiB) Viewed 19031 times
Usually I have snap feature active to ensure clips snap to something. If its not accurate enough you can always re-adjust it or trim it after you duplicate or move it. there are many ways to be very precise.
You can also copy a clip and than depending on where you auto selectors are, you can paste it very precisely.
All copied clips will be pasted to the lowest numbered track with Source Control enabled. If all tracks of a particular type have their Auto Select controls turned off, then no clips of that type will be pasted at all. Tracks with Auto Select turned off will not be rippled or affected by clips being pasted via a Paste Insert command.
You can also trim and adjust clips if they slide from the intended positions and you can nudge audio quite precisely too, if you need to. But usually if the audio is offset form original clip that is linked to, red numbers appear showing how much is offset so its easy to get it into position. And I think there is also keyboard shortcut for it, but I'm not sure.
Hope that helps you with some of the things you are doing. If you are working with animations a lot, fusion is probably better option, and if you are keyframing audio, fairlight offers a lot more, of course, but for basic stuff edit page is good enough I think. For more than one clip adjustments, adjustment clip is probably the most logical option.


